Project Q-Tip: Cotton swabs + paint = a beautiful landscape!
Why Q-tip Painting? 3 Surprises
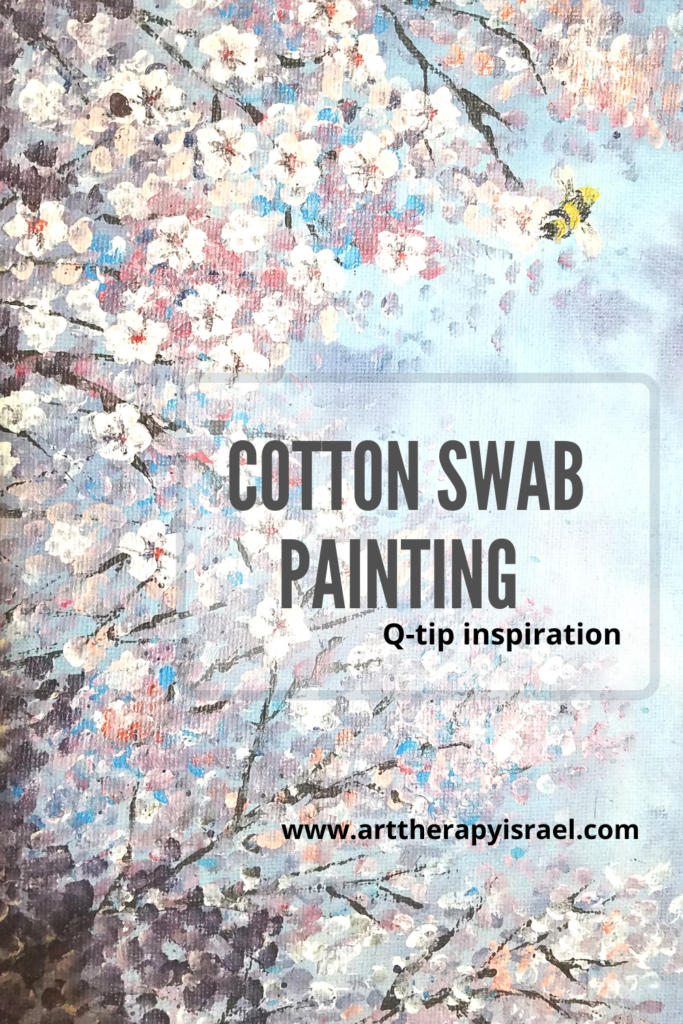
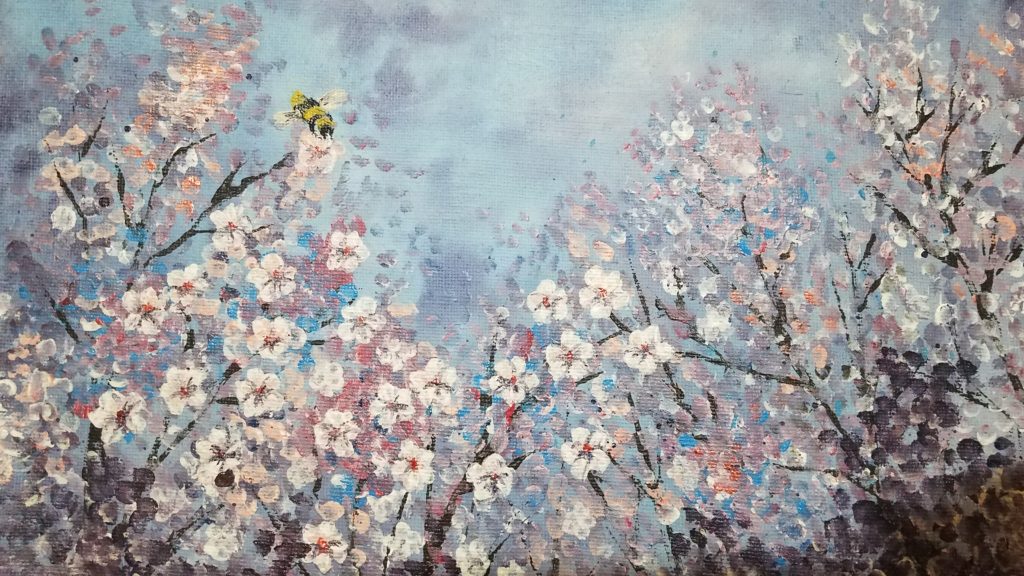
I was inspired by a video tutorial on painting with cotton swabs and decided to paint a q-tip painting of my own. I took out my acrylics and some q-tips, and tried my hand at it. You can see my finished painting above, and I just love it!
That is an acrylic painting on canvas paper. Because it came out so pretty, I went and painted another one, nearly identical, on a stretched canvas.
There were a few aspects to this painting that were surprising to me, and I’ll go through them with you.
- It is super easy to paint with q-tips. After a few dabs, you really get into the hang of it. I started experimenting with full dabs and half dabs, layering them, mixing colors… it went on and on. Kids love this too – try it out with them when summer boredom hits!
- It was a challenge – and I love a challenge – to figure out which colors to layer on each other. I was a bit stumped and had to refer to the video tutorial to give me an idea of what colors might look good. I settled on using a few colors that are pretty similar for the base layers.
- Once you get going, you won’t want to stop! And the good thing about that is that this painting consists of many layers. Fun, fun, fun…
How It Works: An Overview
So, let me tell you about the steps I took in the process of doing my q-tip painting and then I’ll outline for you how you can do the same.
For the background, I mixed a sky blue color and spread it on with a rag. Yes, a regular cleaning rag. You can also use a paint brush. After the first layer dried, I mixed some lavender paint with water to get a wet consistency and ragged another layer on top. Then I wiped off some of the lavendar so that the blue would show behind. Beautiful, isn’t it?
Then I took out my cotton swabs and started dabbing.
The first few layers of my q-tip dabs were done mainly in sky blue and lavendar, to set a misty background. Then I used some darker purples and pinks and white to lay in the main clumps of flowery bushes.
At this point, I used toothpicks to scratch out some dark brown branches. This gives the painting a structured look, and helps point the eye towards the center, where the branches are pointing.
Then I created a focal point for the view by deciding where my main clumps of flowers would be. I took white paint and pressed in very specific flower clumps.
Onward to the final details, which really make the flowers pop. For the detail in those flowers, I used a thin brush and a watered down lavender paint to outline some shadows between the flower petals.
I added some red to the center and ta-da! The flowers were done.
Are you ready to try this out – your own q-tip painting?
Getting Started on Your Own Q-tip Painting
So, here’s the complete supplies list:
- Cotton swabs /q-tips
- Heavy paper or canvas
- A variety of acrylic paint colors, including white
- One thin paintbrush
- Rubber bands (optional)
You’re going to use your q-tips to create flowers. First, choose a color scheme for your painting. For example, you might want a field of yellow flowers. Or you can copy the color scheme that I used above. You’ll need red and blue and white paint to make your purples, and you’ll mix red and white for the pinks. Don’t forget brown or black paint too, for the branches.
Whichever color scheme you choose, you should mix up a few related colors. Then pick a contrasting color and add it to your palette. The contrast makes it more interesting.
Then, dip your q-tip into the first color and start to dab. When the color is used up, take the second color and keep adding. Be bold, and instead of planning it out, just see what happens.
Follow your intuition about when to switch colors. When you’re ready, dip your cotton swab into another color of paint and add more dabs.
As your field of flowers develops, you can be more specific. Add more detail to some of your larger flowers and accentuate them. Outline the leaves and add some shadows. Add some of the contrasting color and add some highlights to your flowers.
Remember, this is a process. Be curious about what will unfold.
Creative Tip (no pun intended!): If you’d like, you can tie a rubber band around a group of q-tips, and dab with all of them at the same time.
Either way, keep on painting until you decide that it is finished… and only you can say, because it is your art, an expression of your inspiration and creativity!
Your painting may start out as abstract and stay that way, or it might take form into something more concrete. Reminiscent of George Seurat, this is a form of pointillism, which was a painting technique that combined colors by mixing dots of individual color.
This was fun, wasn’t it?
This painting activity can also be therapeutic if you’d like to experience letting go. Have you ever found yourself trying to control circumstances that are were out of your control? Well, you’re not alone! This experiential is an opportunity to practice letting go of expectations, being with uncertainty, and enjoying the process of going with the flow.
I hope you liked it as much as I did. You can also save the image below to your favorite painting Pinterest board to try out later!